Social Icons

.

Thursday, March 31, 2016

Movie Poster Case Project

I know we are in the middle of building the bar and this might seem out of place but it is relevant.  For some reason it is taking much longer than expected for the stain and polyurethane to dry, so we have to find other things to work on while we wait.  Many of the remaining items on the bar "to-do" list produce dust and we can't do that while we have wet stain or poly.  Also, it is still too cold out to stain in the garage, so we had to find other things to do that are related.
In the bar area, just outside the media room is a wall we had planned on decorating like the outside of a movie theater (sort of).  We wanted to put somewhat authentic poster cases and put some of our favorite movies in them.  If you ever look online at these things you will quickly find that they range in price from $600-$2,000.  Even for a custom 27" x 40" framed and matted poster it is $300 for a nicer frame (not just plane square black).  So we went online and looked at various frames and picked the ones we liked and sketched out a plan.  The first one was the proof of concept and an opportunity to learn all our lessons and make mistakes :(  Despite the imperfections that we will correct down the road (both on the next 4 we have to make... and later on this one), it turned out really nice. Oh... and total cost was around $175.  The Lexan was $65 of that.  I really prefer the Lexan over glass due to weight and durability but it would have been cheaper to buy the premade 27x40 frames on sale from Hobby Lobby for $35 and just not use the frame... just use the glass and poster backing.
Lessons Learned:
 - Didn't mark which side was the smooth side on the birch plywood. Before cutting it was obvious but after it wasn't... and after test fitting several times, when we went to glue everything together we accidentally put 2 of the 4 pieces upside down and didn't notice until we painted and the rough grain showed through.
- Used spackle and caulk to fill gaps and try to blend some of the seems between pieces of wood.  We cut everything pretty tight but you could still see small gaps because of the edge.  Next time we need to do 2 things. 1.) Sand more and to a higher grit (maybe 400) to help blend and also produce a smoother surface for paint. 2.) Use bondo versus spackle to achieve a smoother surface and blend better. At some point, we will sand down the first one, bondo it and re-paint.
- We initially started building the inside frame with screws and things moved a little. Partially because we used glue too and also because we couldn't get clamps on every intersection.  Also, the screws wanted to split the wood because we didn't pre-drill.  So we switched to just using our nail gun and brads which worked much better.


Here are some pictures:


Humble Beginnings...the outer frame


3" Recessed Boarder


Dado cut for 3" x 1/4" Birch strips. Didn't actually use a Dado blade, just
made 2 passes with a regular saw blade moving the piece over 1/8" of an inch.


All dry fit and ready for assembly


Glued and nailed together with wood putty in all the nail holes


We made an 11th hour change. We had some scrap left over from other
projects and this one, so decided to build up the top and add crown


Final product with crown. We also caulked a few of the
seems in this pic too.


Back view... also starting to spray Kilz primer.


Lexan cut down to size and added to custom picture frame
we made.


All primed, ready for paint


We just hit the pack with flat black to seal the wood and
give it a finished look if you were able to see the back at all


Painting on the metallic gold paint. Of course
EVERY imperfection is showcased with this stuff.
Ugh... next time we will do better.


All painted


Picture frame painted


Movie poster case with picture frame attached


Frame mounted and Lexan installed. We are going to
paint the wall behind these flat black.


Poster added... we hadn't mounted the poster to the
poster board yet, so you can see a little white at the top.


You can kind of see some lines on the wall where we
laid these out. We had to move them over 2.5" after
adding the crown molding.


Saturday, March 26, 2016

Bar Project Series #16: Staining the Bar Top

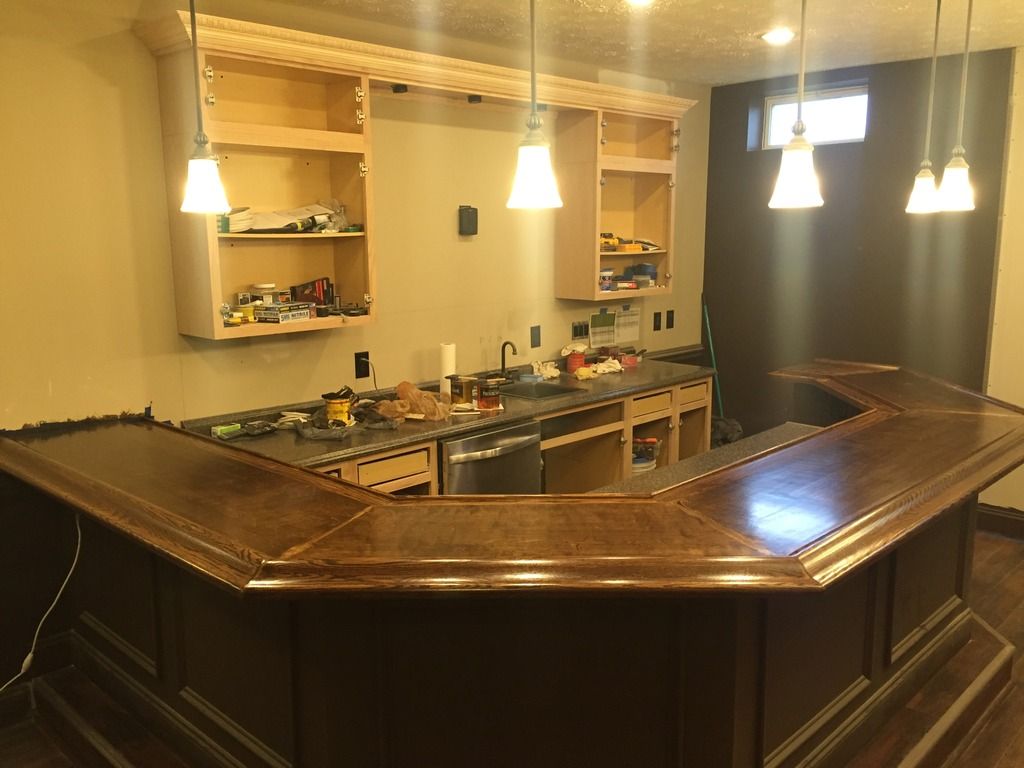
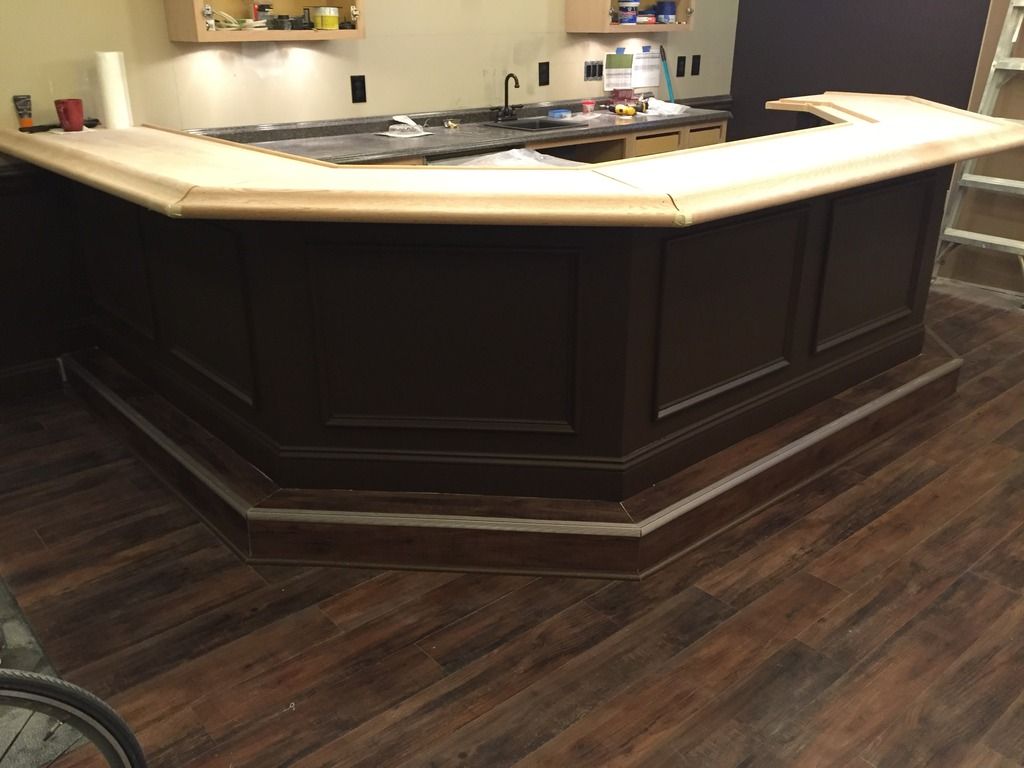
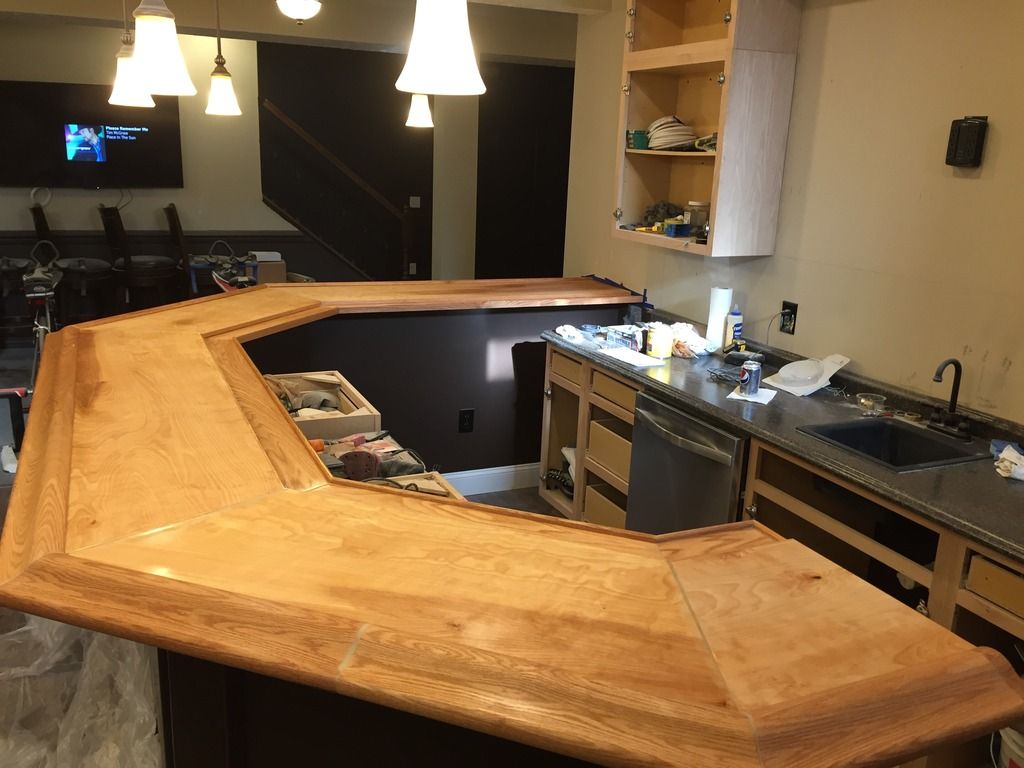
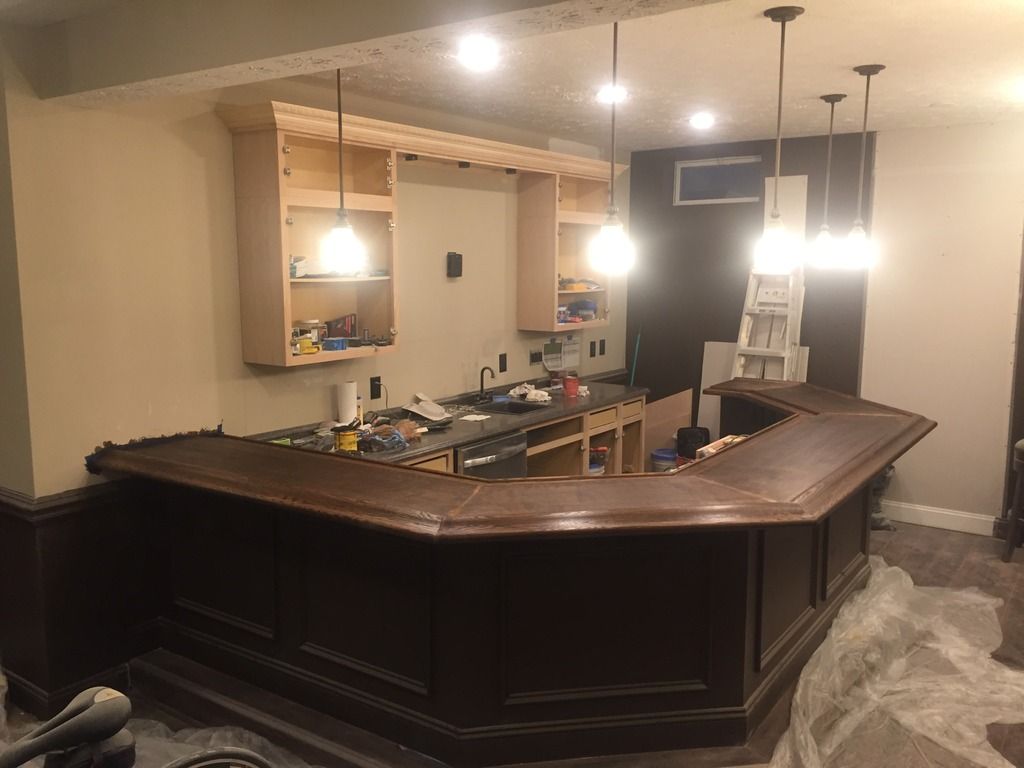
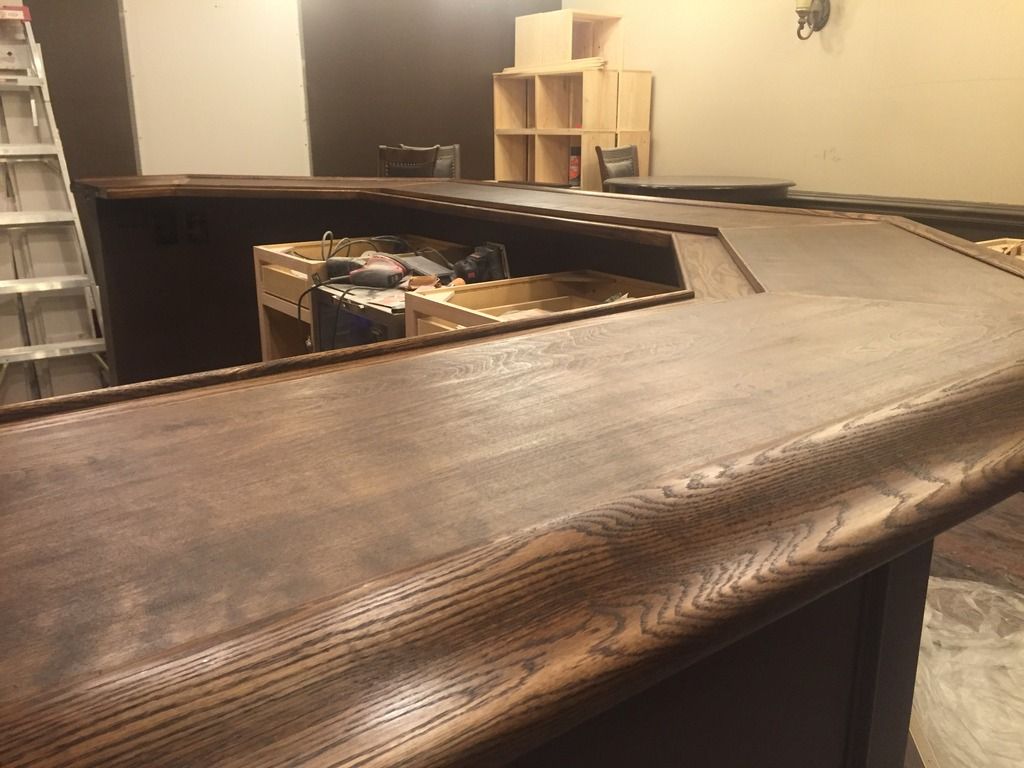
So this is something we have really been looking forward to.  The bar top itself is the main piece of furniture, if you will, where people will gather.  It's the thing that will be used and looked at the most.  So it's appearance, size/design and durability are very important.

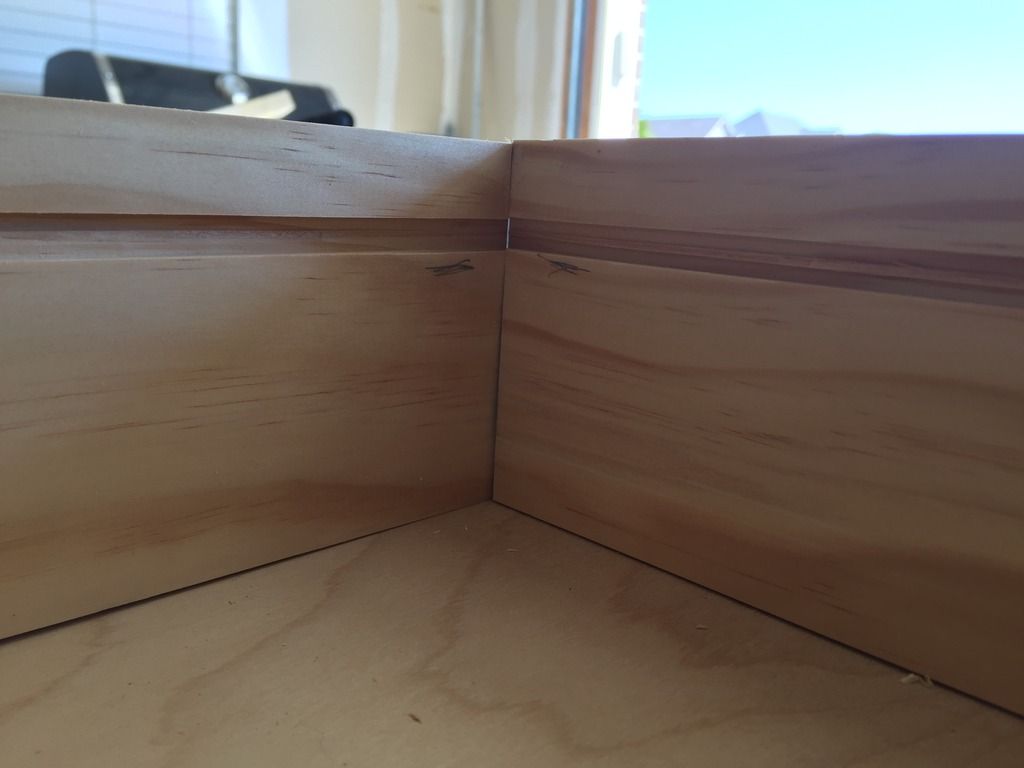
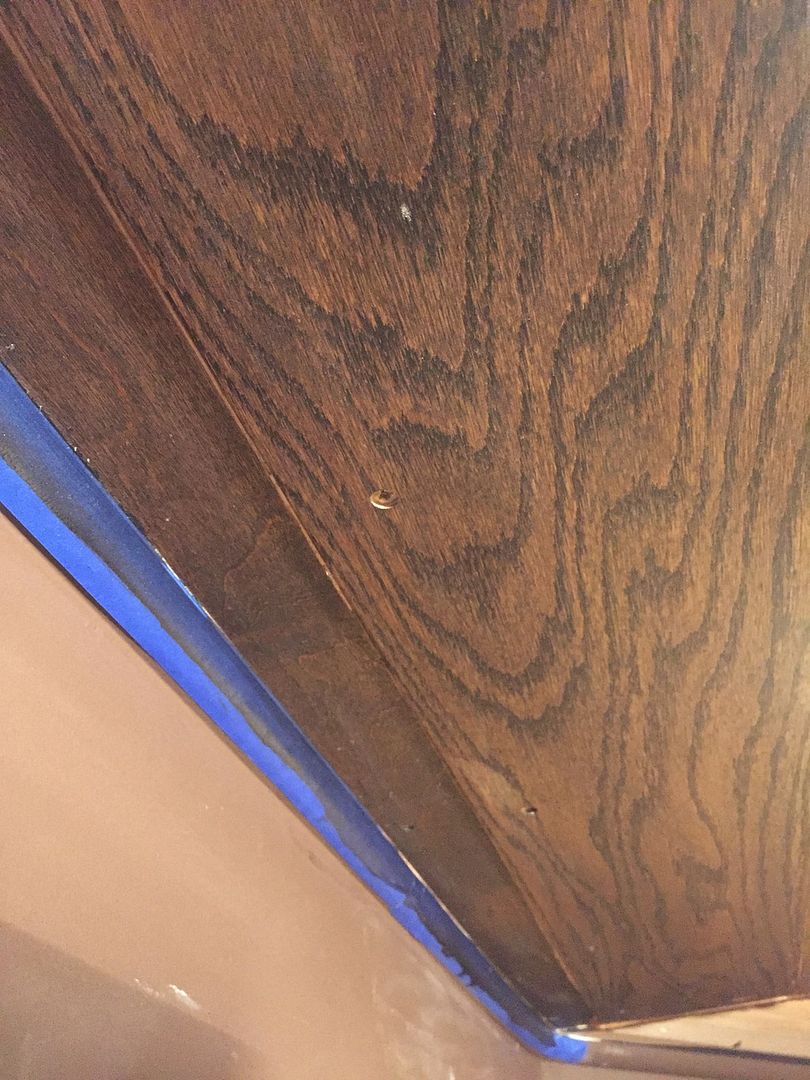
We would like to say that it turned out perfect but it didn't.  Now, some would say the imperfections add character... but when you put so much time and effort into something, you really want it to be as perfect as possibly.  Not to mention the point made above.  People will be looking at this thing for years to come... and potentially home owners after us.

Lessons Learned:
 - Build bar top independent of bar wall and level/install after the fact
 - This would help alleviate the need to fill gaps... which leads to my next point
 - The gap filler product left residual product deep within the grain that we could not see prior to staining.  Although we sanded well, the Wood Filler product was resident in the grain and discolored the stain.
 - Minimize the amount of glue that gets on surfaces you will later stain.  Much like the wood filler, although we thoroughly sanded areas where wood glue had gotten, it left behind just enough in the grain to discolor the stain (or not allow the stain to soak into the wood).
- Pay closer attention to the amount of time the stain was soaking into the wood prior to wiping it off.  We started staining on one end of the bar and when we got to the other side, we started wiping off the excess because it had been about 15-20 minutes.  Although we did go back to the beginning to start whipping, the area we had just stained had only been sitting for maybe 3-5 minutes when we got to it and began whipping it down.  This showed a clear difference in the coloring of the wood.  So on the second coat, we set a timer and started on the opposite end of the bar so it would have a longer period of time allowing the stain to soak in.  When the 15 minute timer went off, we whipped down about half of what we had stained, then set the timer again and kept going... repeating this a few times until we were done.
- Use Foam Brushes when applying the Poly from the start.. We started with a regular bristle brush and had 2 issues.  First, it left more brush marks than the foam brushes did and second it was creating bubbles that would dry as bumps in the Poly.  This also makes clean-up easier because you don't have to clean these inexpensive disposable brushes.

Items Accomplished:
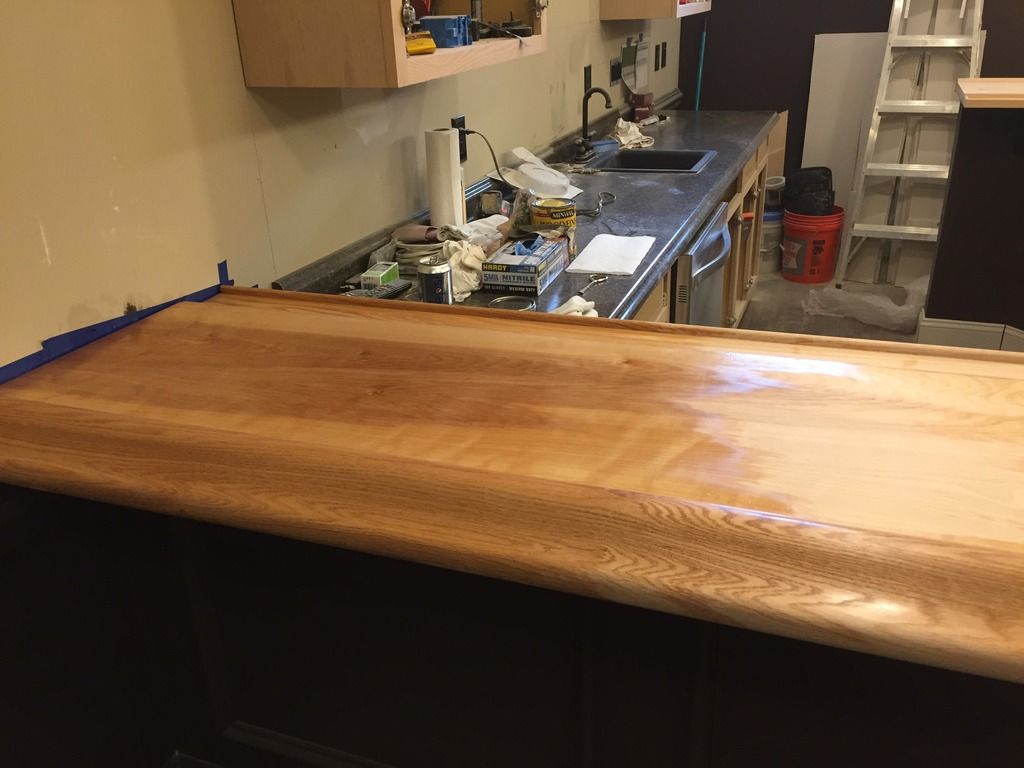
 - Sanded Bar Top with 120/150 and 220 grit
 - Applied a Minwax Pre-Stain product to ensure even adhesion
 - Applied 2 coats of Minwax Jacobean Stain (Oil Based Stain)
 - Applied 3 coats of Minwax Polyurethane (Oil Based Poly)
    - Note: We applied 1 coat of Satin, didn't like it and then added 2 coats of Semi-Gloss... it seemed to work out well and didn't look cloudy or discolored.


Applying Minwax Pre-Stain


Pre-Stain all Applied


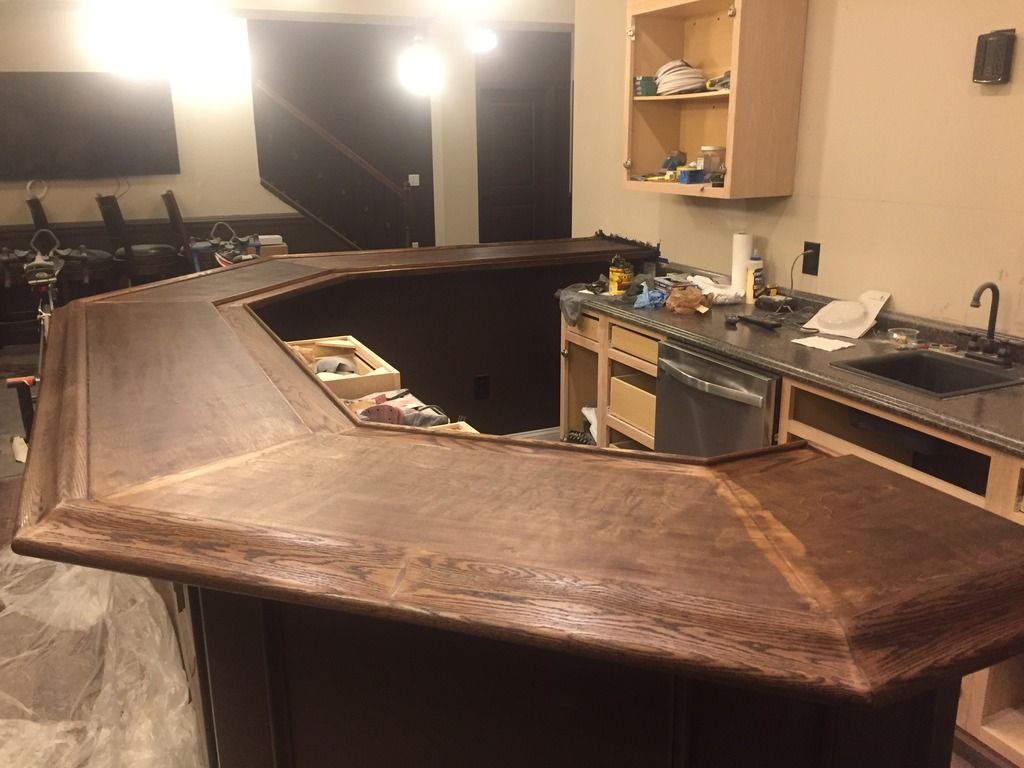
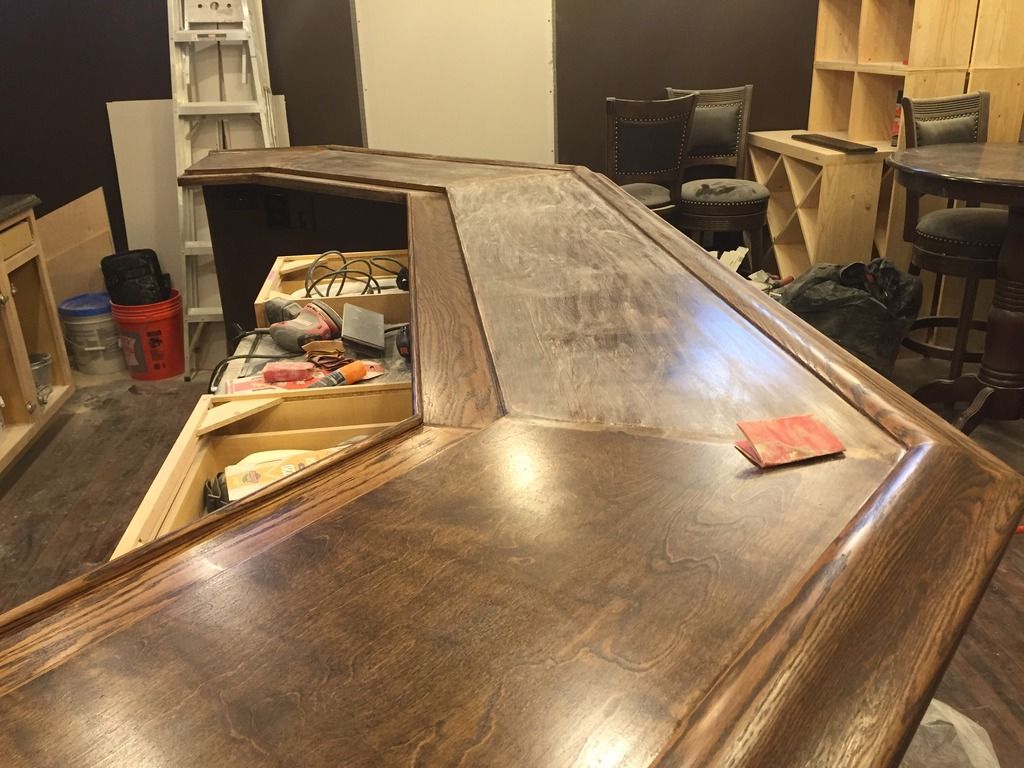
In this pic you can see the areas where the stain didn't take all the way
Reference our Lessons Learned above :(


Second coat of stain added... still drying here


2 Coats of Stain... All Dried


Adding first coat of Satin Polyurethane


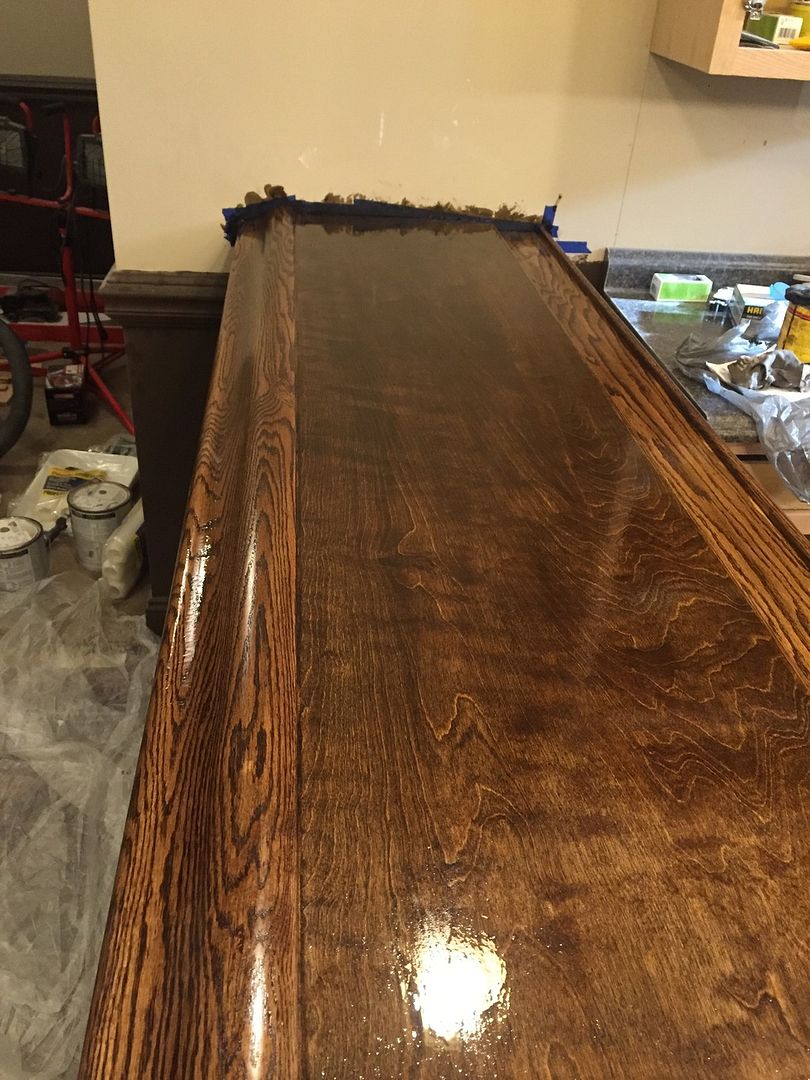
First Coat of Poly... Still Wet. This was the Satin, so
it was not nearly this shiny when it dried


First Coat of Poly all done but still drying


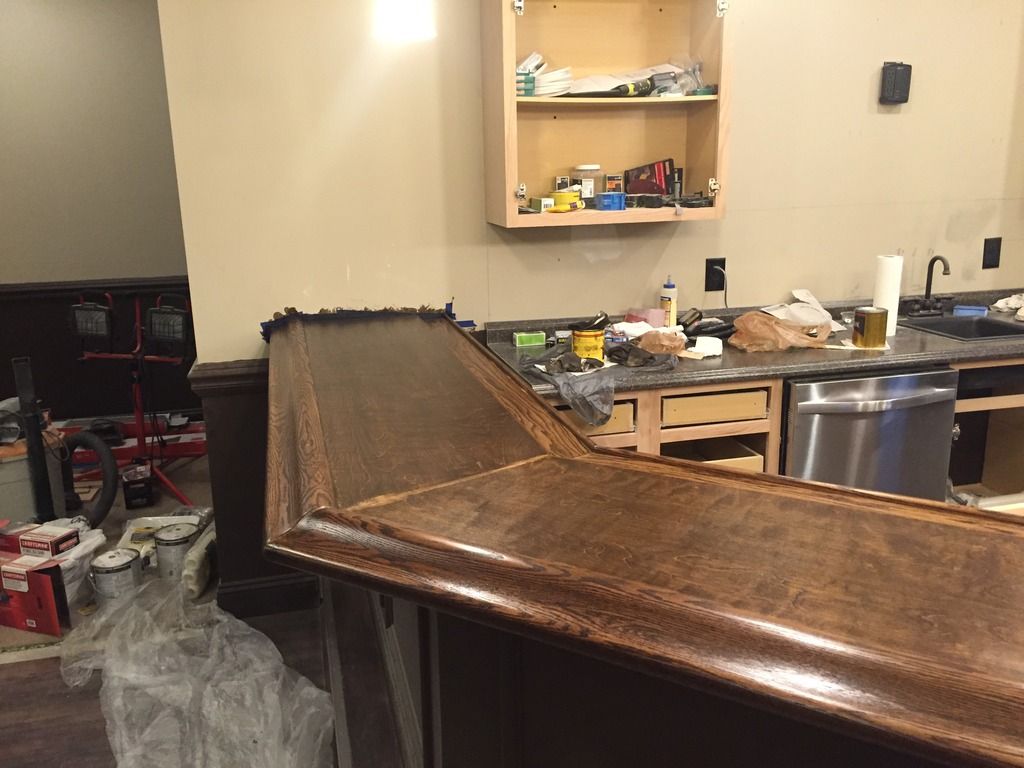
First coat of Satin Stain Dried... we didn't like the sheen. Not shiny enough


Lightly sanding with 220 to add second coat of Poly (Semi-gloss this time)


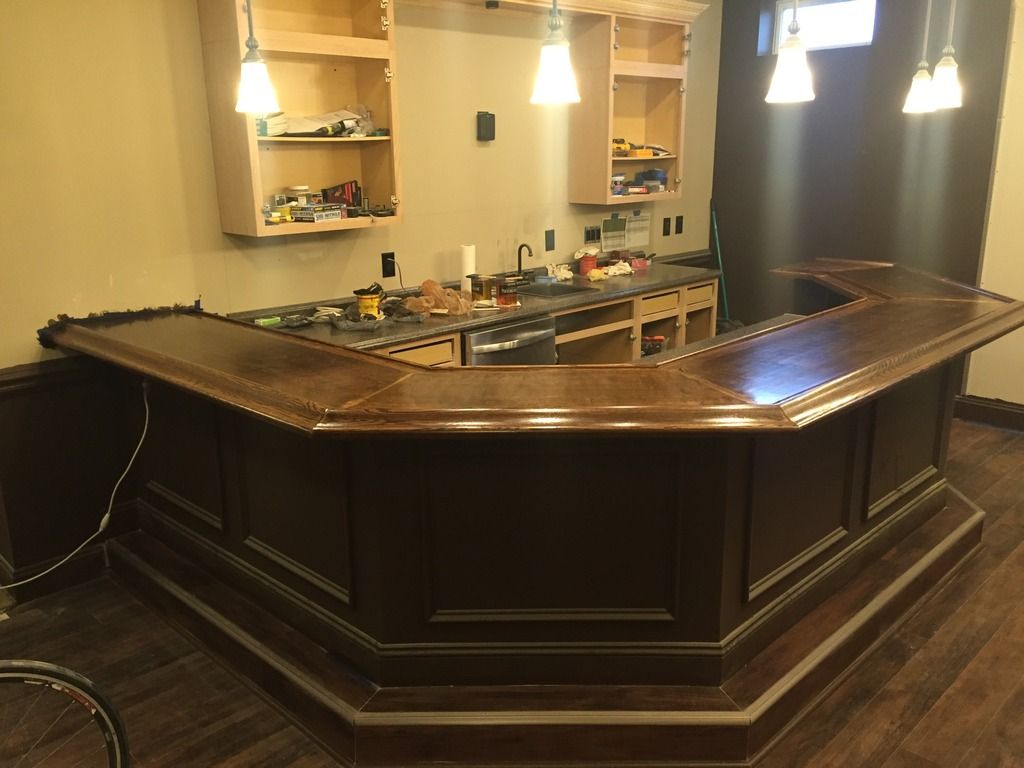
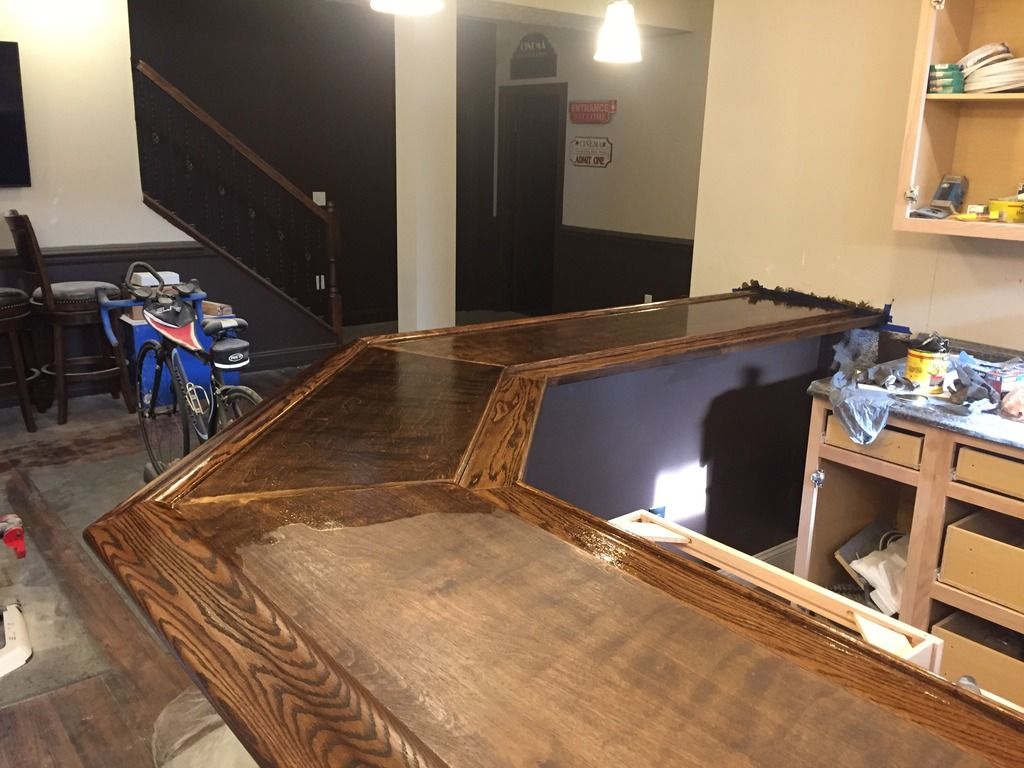
3rd Coat of Semi-Gloss Poly Dry. This is the final sheen...
Will have to get better pics without glare :-)


Thursday, March 24, 2016

Bar Project Series #15: Prepping Bar for Staining and More Trim Work

Lots more activity to talk about... Although the things to do list is shrinking it's still quite daunting.  But we are eating the elephant, one bite at a time... Staying focused on the next task and only looking at the items down the list just to anticipate what supplies/materials we will need and timing (e.g. dry times, and/or NOT producing dust while things are drying, etc.).

Items Accomplished:
 - Installed Baseboard on back side of Bar Wall
 - Spackled, Caulked and Painted Baseboard
 - Installed Quarter Round at base of cabinets
 - Filled Quarter Round nail holes
 - Sanded Underside of Bar (120 followed by 220 grit)
 - Sanded nail holes in bar top
 - Filled and sanded gaps in bar top (Used Minwax Stainable Wood filler)
 - Closed awkward cove in back wall


Baseboard and cabinet quarter round installed


Baseboards spackled and caulked


Baseboards painted


Framing gap in back wall


Gap sheetrocked and ready for tape and mud


Thursday, March 17, 2016

Bar Project Series #14: Primed and Painted Bar Wall and other Misc

Although the spackling, caulking and painting can be a bit of a pain, it is a signal that we are moving out of the construction phase and moving into the finishing phase.

Items Accomplished:
 - Added quarter round between bar wall and bar top to cover the gap
 - Spackled and caulked quarter round
 - Spackled all the trim on front of bar wall
 - Caulked all the trim on front of bar wall
 - Touched up drywall mud (will probably need to touch up some more pin holes later... but it's good enough from 10ft away... haha)
 - Primed bar wall and trim inside and out
 - Installed junction boxes inside stub wall cabinets
 - Painted bar wall and trim inside and out (Haven't installed inside bar wall baseboard yet)
 - Sanded, prepped and stained under bar top (Just above stub wall cabinet)
 - Leveled and mounted stub wall lower cabinets
 - Cut stub wall counter top to fit wall
 - Attached build up blocks to counter top for mounting and laminate end caps (still need to attach laminate and file to fit)
 - Hooked up electrical for stub wall
 - Filled holes in bar top with wood putty (Still need to sand and touch-up)
 - Had to Epoxy the Handle back on the Refrigerator. It must have gotten damaged in shipping... but I've had the unit for a while and didn't see an easy way to get a new handle because it was tack welded on.
 - Set, siliconed and secured Sink and Faucet
 - Built all water supply lines (just need to hook up to water supply)
 - Set, puttied and secured sink strainer


Added quarter round between bar wall and bar top


Outside Bar Wall Spackled, Caulked and Primed


Kind of looks good White


Inside bar wall primed


Cutting In


First Coat Done


First Coat Inside Bar Wall


Stained Under Part of Bar Top
Had to do this before setting stub wall cabinets
and counter top


Testing stain on back of one of the drawer faces.
This is after 1 Coat (of 2) and doesn't have the
satin Poly on it. I also didn't use the
 pre-stain conditioner...


Cabinet outlets installed


Other cabinet


Gluing Build Up Blocks on Cabinet


Water lines built. Dishwasher lines routed and read to install


Beer Fridge Installed and Ready to be Stocked!!!