+Cleaning+041.JPG)
+Landscaping+Day+2+035.JPG)


+PreSettlement+Walkthru+001.JPG)

Items Accomplished:
- Finished patching holes made from running wires on bar back
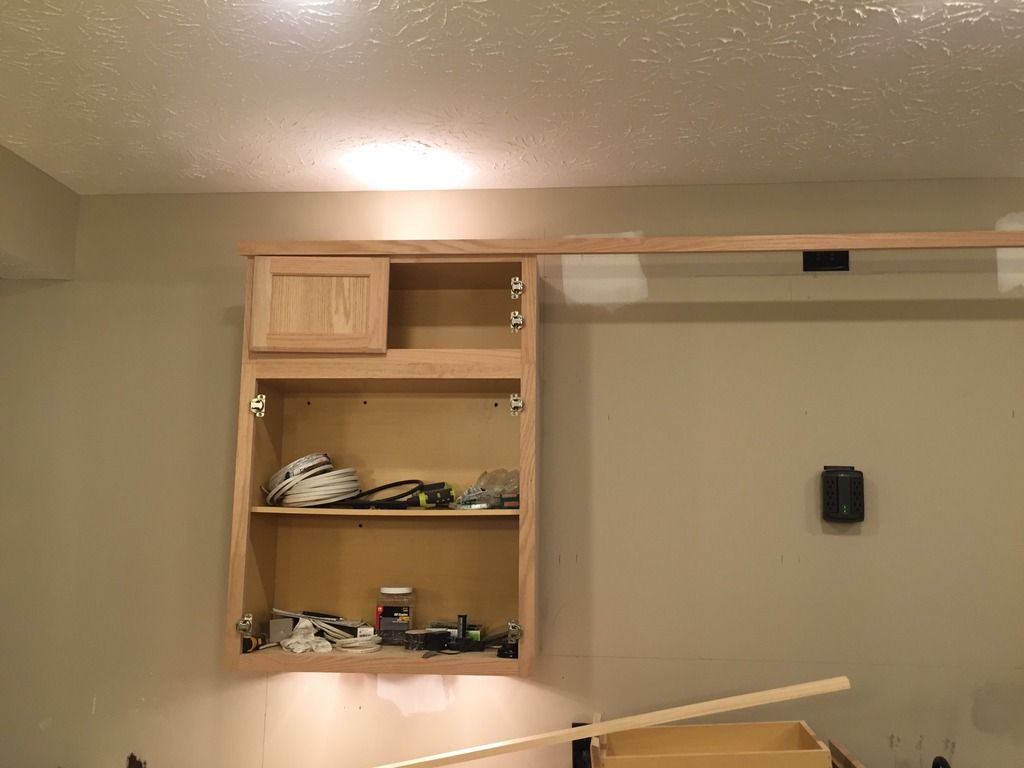
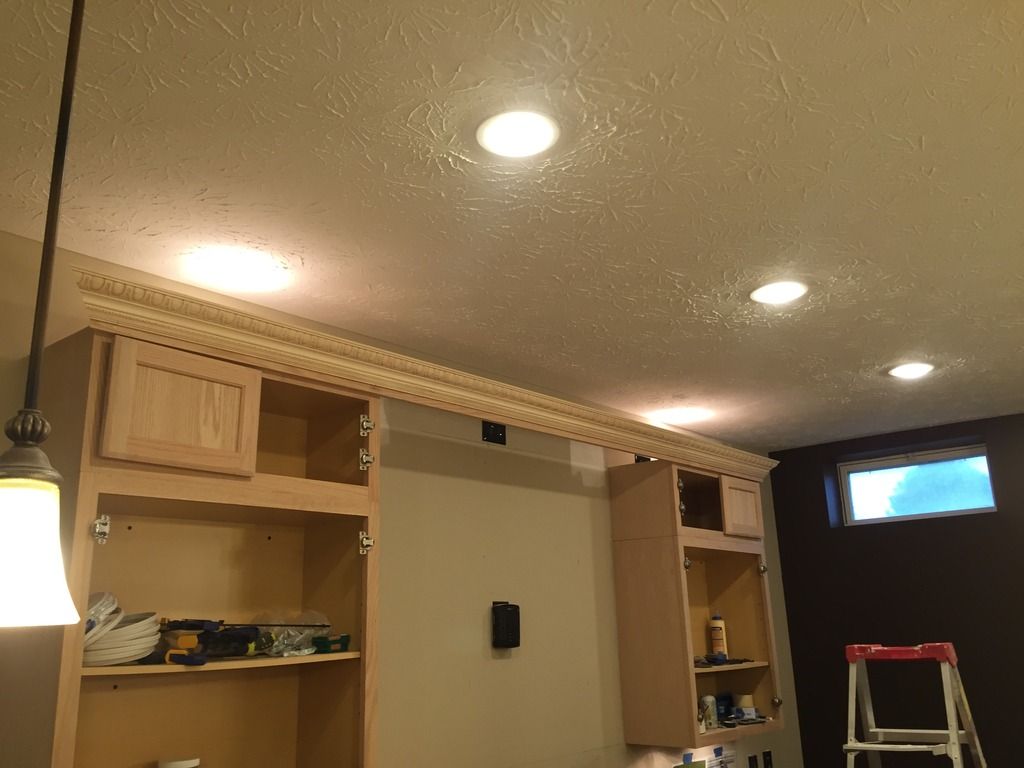
- Mounted 12" Tall Upper Cabinets to 30" Uppers and Wall
- Alignment isn't great due to wall being crooked. Will need to sand faces a bit before staining
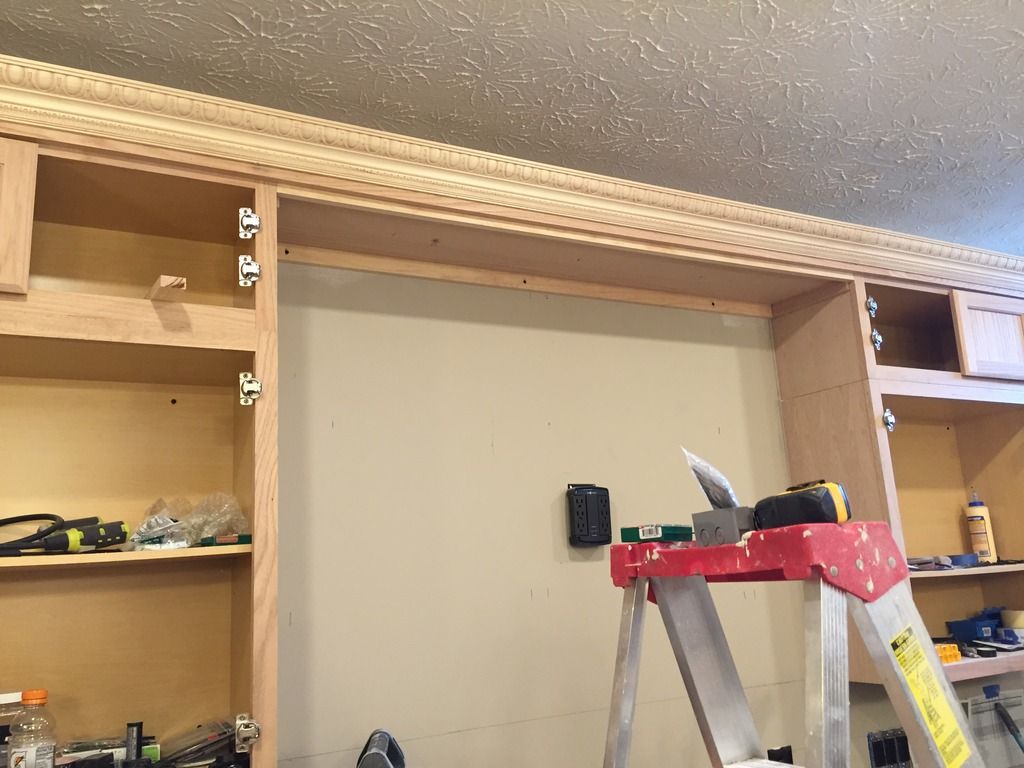
- Built Bridge above cabinets
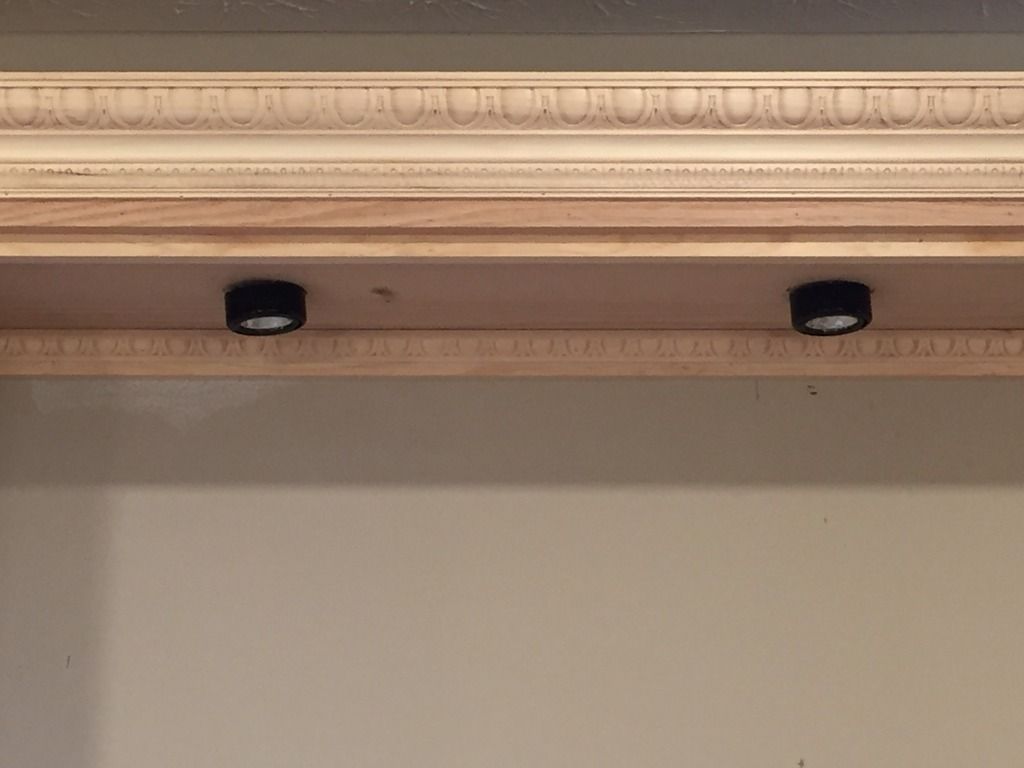
- Wired and installed rest of above cabinet and under bridge Xenon puck lights
- A little concerned that although the lights under the bridge will provide task lighting for the bar sink and counter top, they might cast a glare on the TV going in between the cabinets. Originally, these 3 lights were going to be on a separate switch but we ended up putting them on the same one as the rest of the puck lights.
 |
| Ran a piece of Red Oak 1x2 across both upper cabinets |
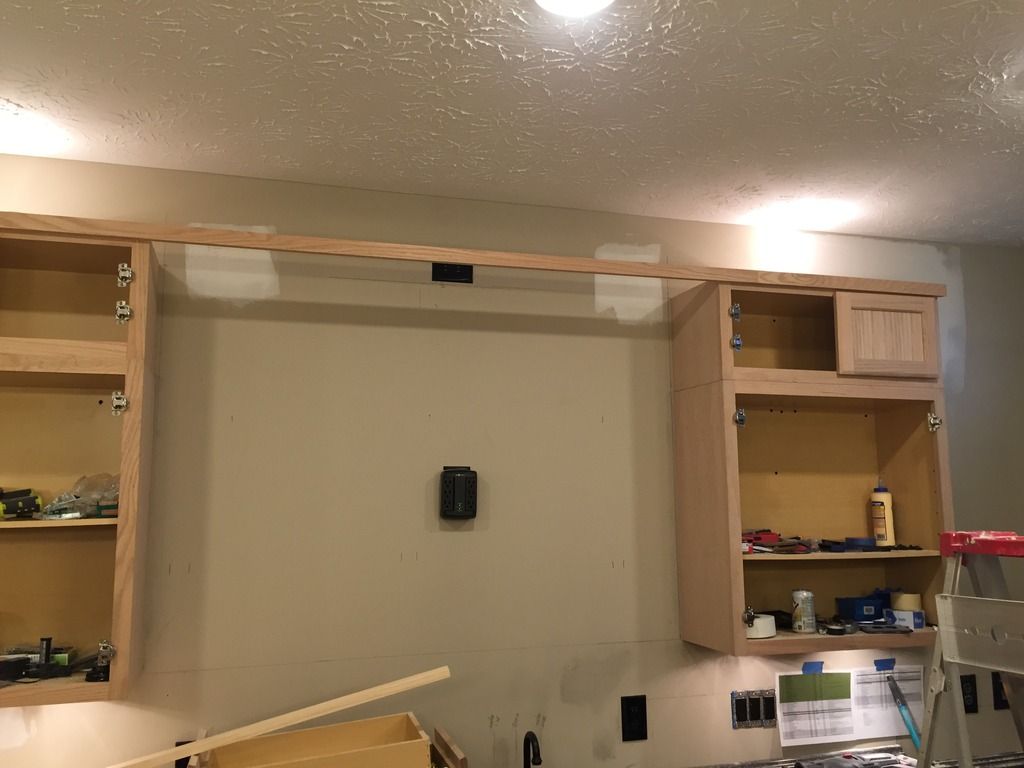 |
| Had to scarf in a 2' section on right. You can see it up close but from a distance it's tougher to see. Will need to sand down a bit to hide joint. |
 |
| In this pic you can see the gap between Oak Veneer on the 12" and 30" cabinets. These panels come in 12"W x 30" H sheets. Unless you want to buy and cut a 4'x8' sheet. So we will be putting a piece of trim over the gap. |
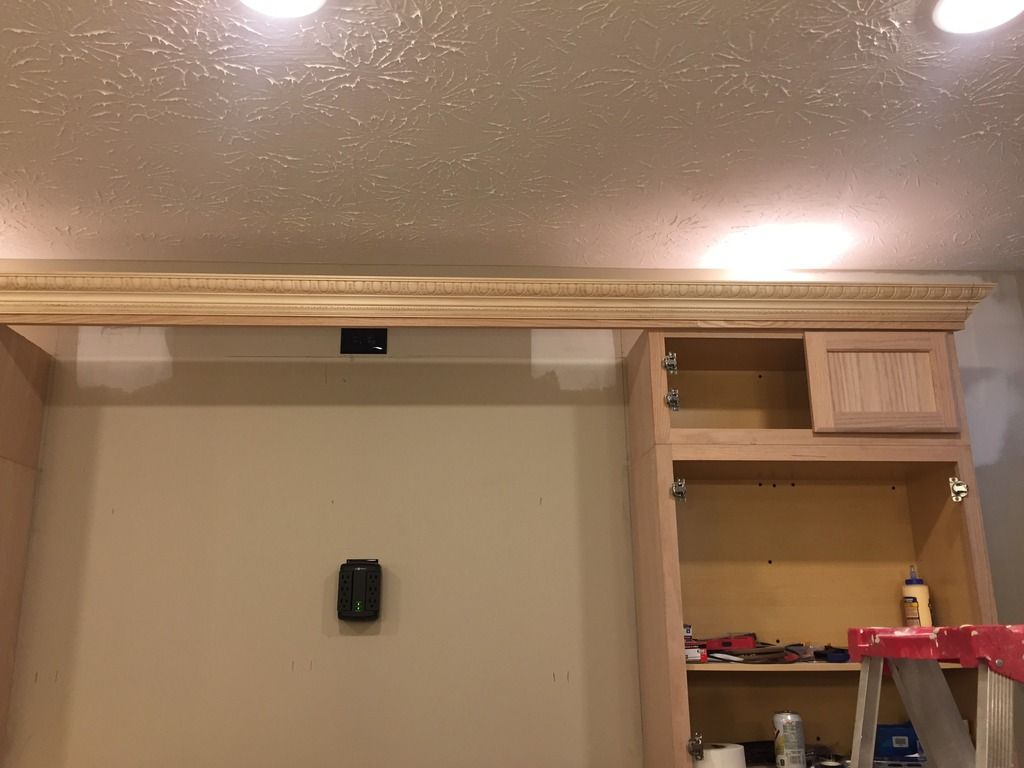 |
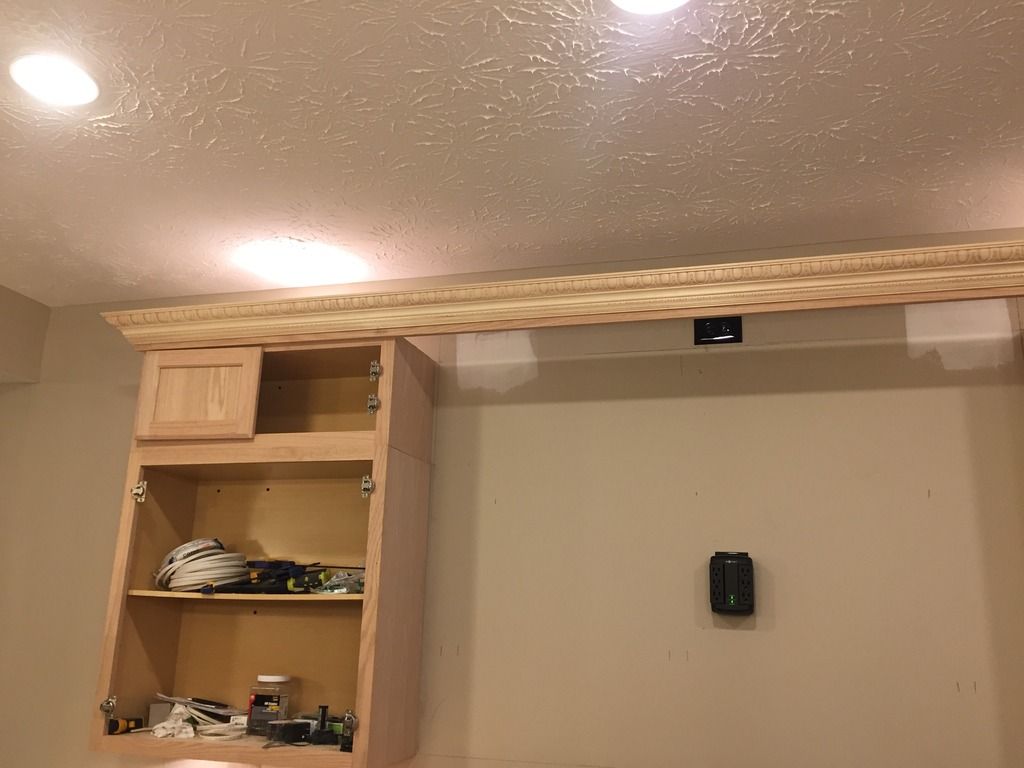
| Crown installed. Again there is a splice on the right side... which you can see up close. Still need to do some glue magic to hold the two pieces together. |
 |
| Those doors r just loosely put in place to get spacing. They're not adjusted. |
 |
| Crown finished and panel in middle installed |
 |
| Probably going to add some cove molding on that piece in the back with the screws. |
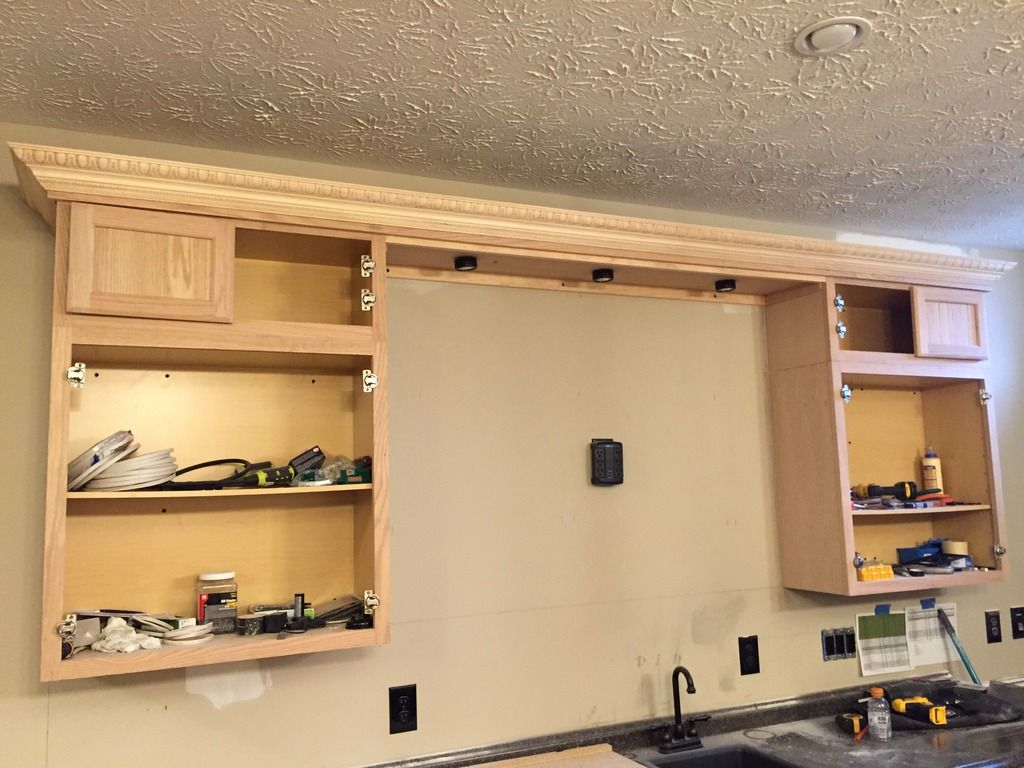 |
| Puck lights installed and wired |
 |
| All Lit Up!!! Of course in person it doesn't look like you have 5 spot lights on the ceiling. The naked eye just sees a light glow! |
 |
| Added a decorative trim piece to back to dress up support piece |
 |
| Close Up Shot of Trim... Don't look too close :-( |
No comments:
Post a Comment